

Sewing with your kids is a great way to let them explore their creativity while building a useful skill and gaining a fun hobby!
Simple hand sewing projects are the perfect place to start – especially for younger kids that aren’t ready for the sewing machine. A heart plushie is an easy and fun project to start with. It’s a simple shape that doesn’t require going around a lot or corners or steep curves. Also, there aren’t any additional pieces that need to be attached – it’s just two pieces of fabric joined together with some thread and stuffed with pillow batting!
What you need to sew a heart plushie
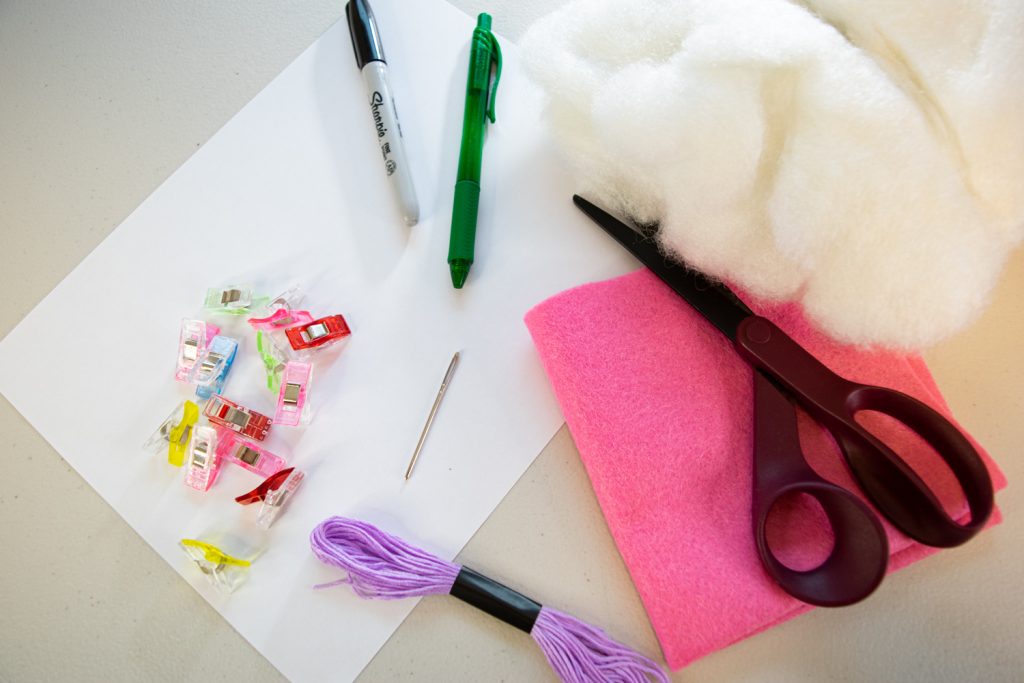
Let’s start with the supplies you’ll need for this easy sewing project.
- 12-inch square of pink felt (or your child’s favorite color)
- matching or contrasting embroidery thread
- pillow batting
- tapestry needle
- scissors
- pins and/or clips
- pen or sharpie
How to sew a heart plushie: a step-by-step tutorial
Below, we will go into detail on how to sew this simple heart plushie in five simple steps. Try it once yourself, then have fun teaching your kids how to sew their very own plushies!
- Make your heart template
- Cut out the shapes from the fabric
- Sew the two heart pieces together
- Stuff the plushie with batting
- Finish sewing the pieces together
Step One: make your heart template
Unless you’re just a super confident person ready to freehand cut a heart shape from the fabric, you’ll need a paper template to cut around. This will help you get a shape that’s the right size and not lopsided.
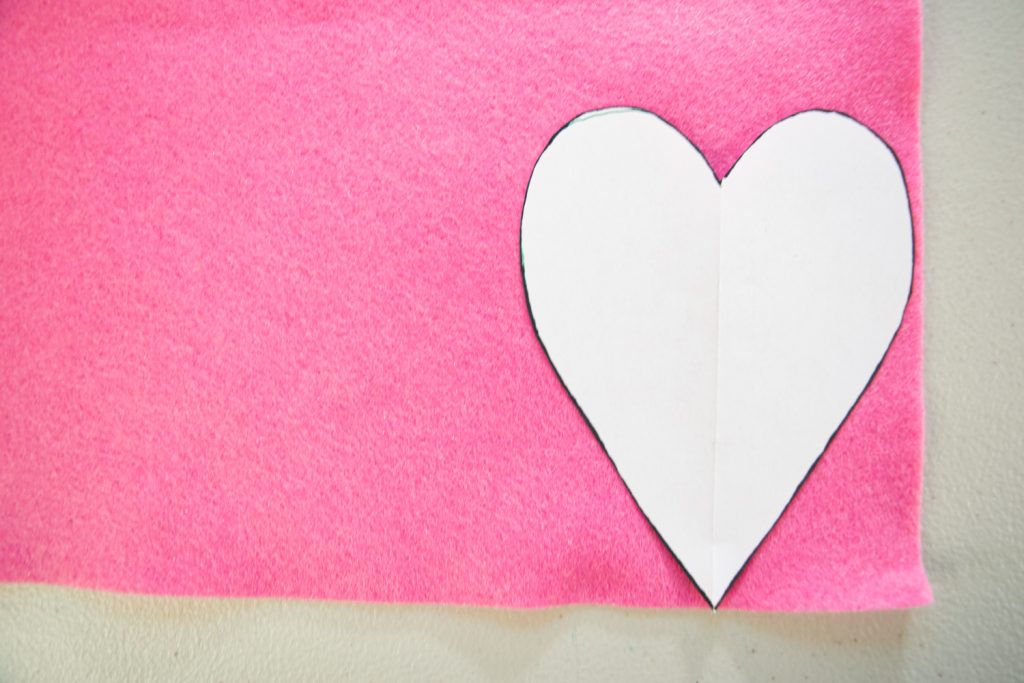
You can look online for a good heart shape and print it out – but I find it faster and easier to just make my own template.
To make your own heart template, first grab a piece of paper, fold it in half, and draw a half-heart-shape with the center of the heart at the fold. You can experiment with different sizes of hearts until you find the size that you want for your plushie.
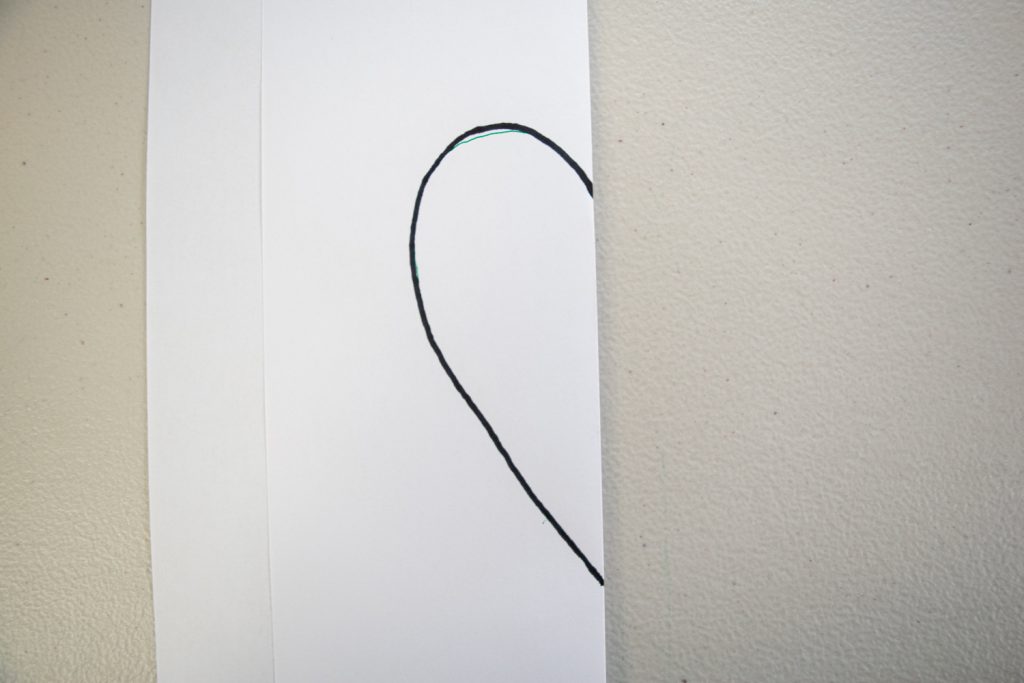
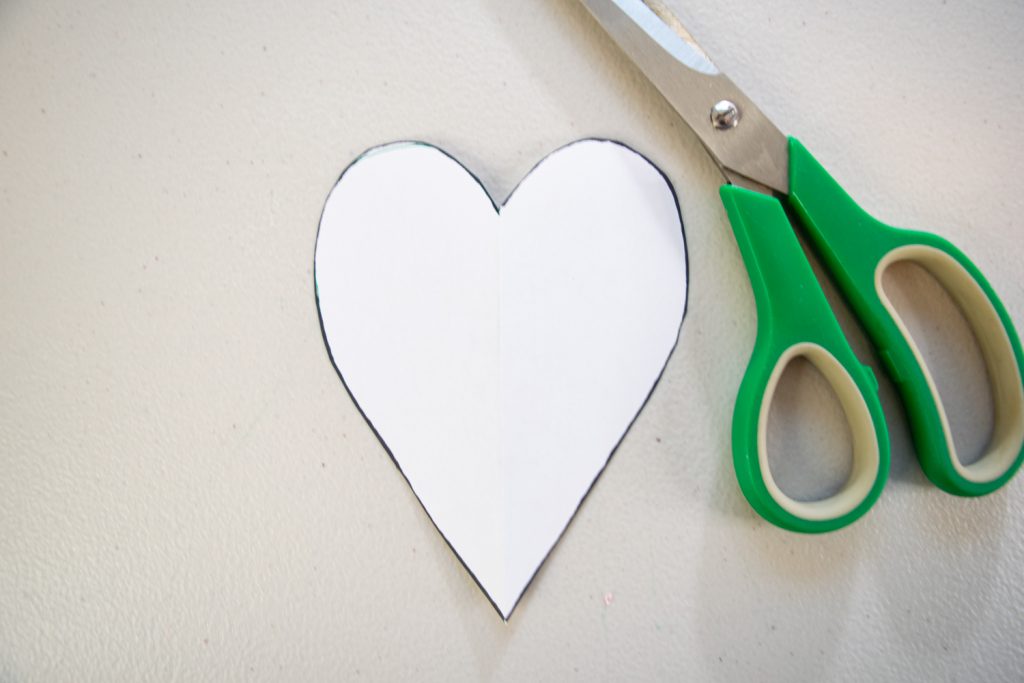
Next, cut along the line that you just drew, leaving the fold of the paper intact and cutting through both layers. Once cut out, you can unfold the paper and will have a beautifully symmetrical heart shape.
Step Two: cut out the shapes from the fabric
With template in hand, it’s time to start cutting the fabric. If you’re planning on having your kids sew this project, you can have them cut their own pieces or you can prepare the pieces in advance and let them start with the next step – the sewing!
Lay the template on the fabric – I prefer to get it as close to the corner as possible to conserve fabric.
Pin through the paper to attach it to the felt.
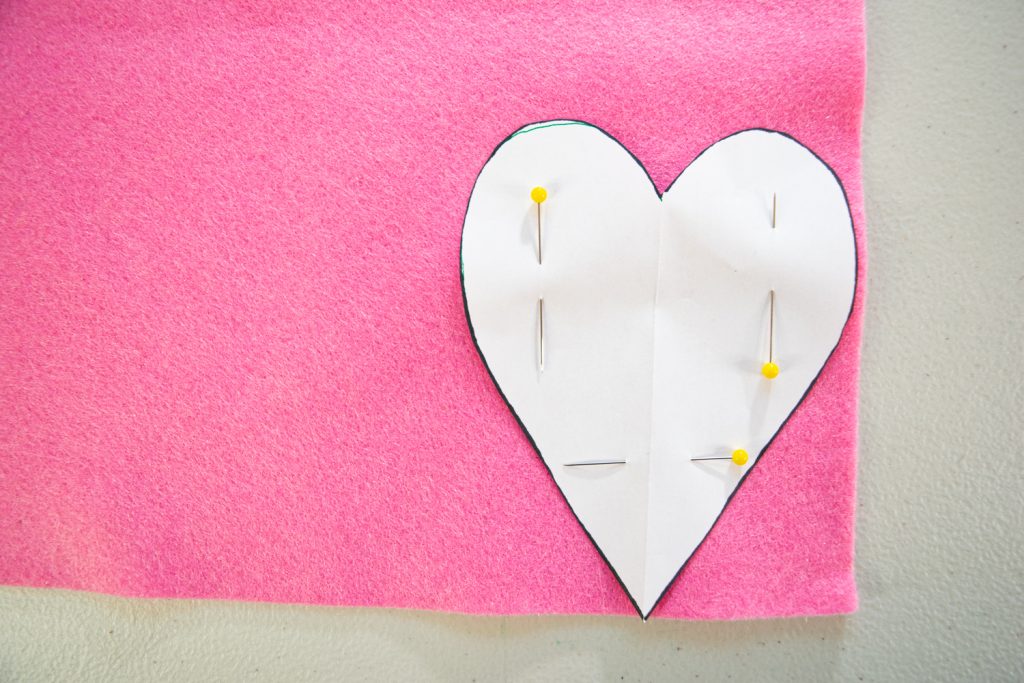
Next, cut carefully around the paper template.
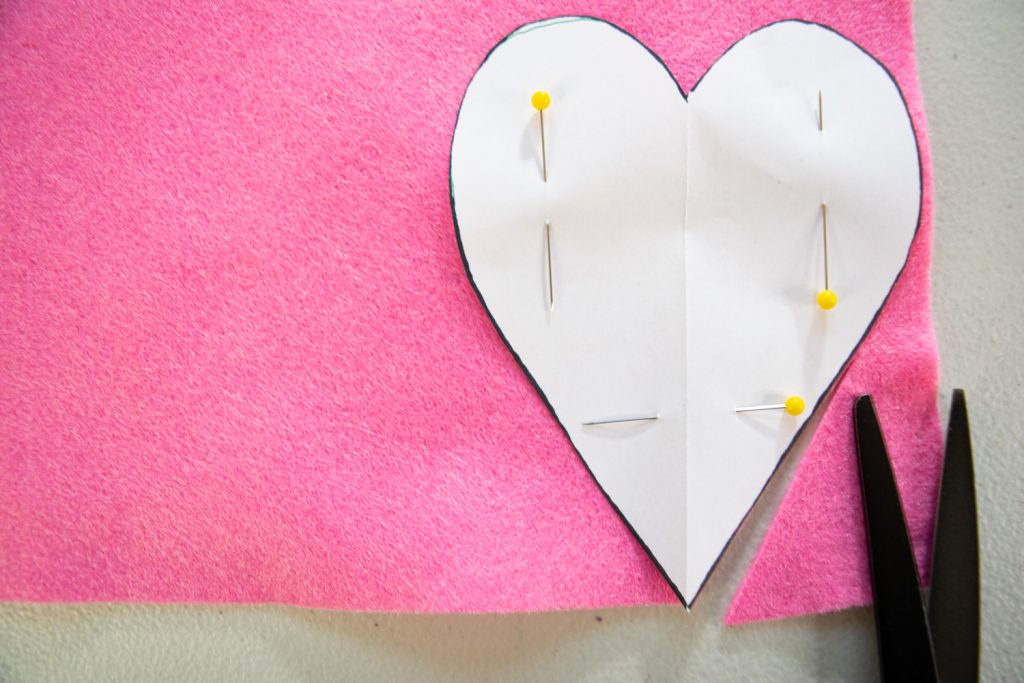
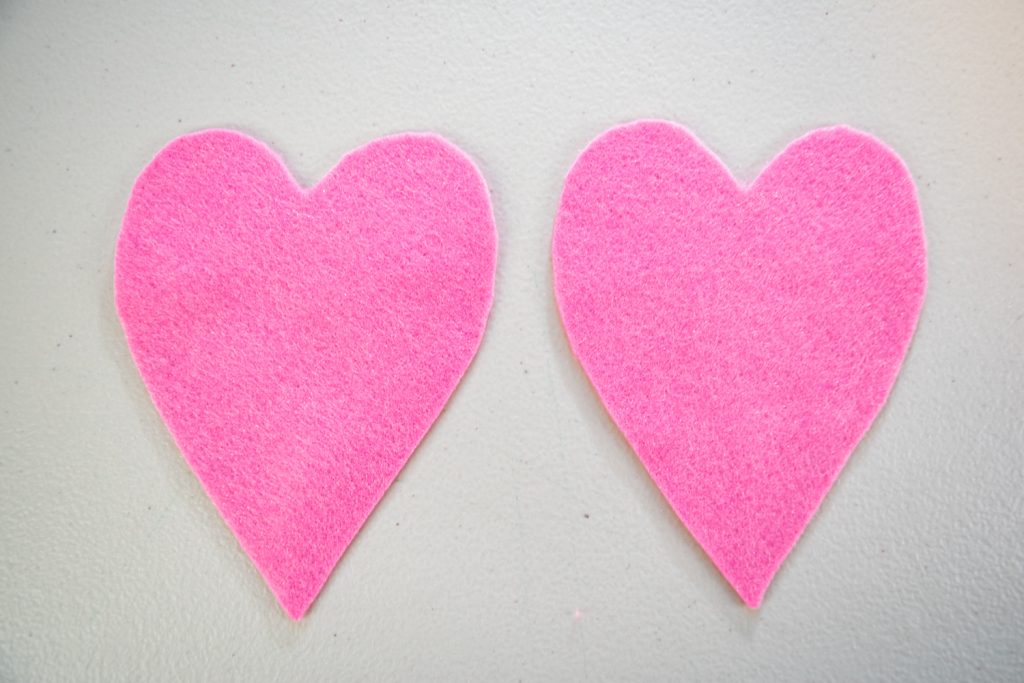
Once you remove the pins, you’ll have your first felt heart!

Repeat that process to cut a second heart with your template.
Step Three: sew the two heart pieces together
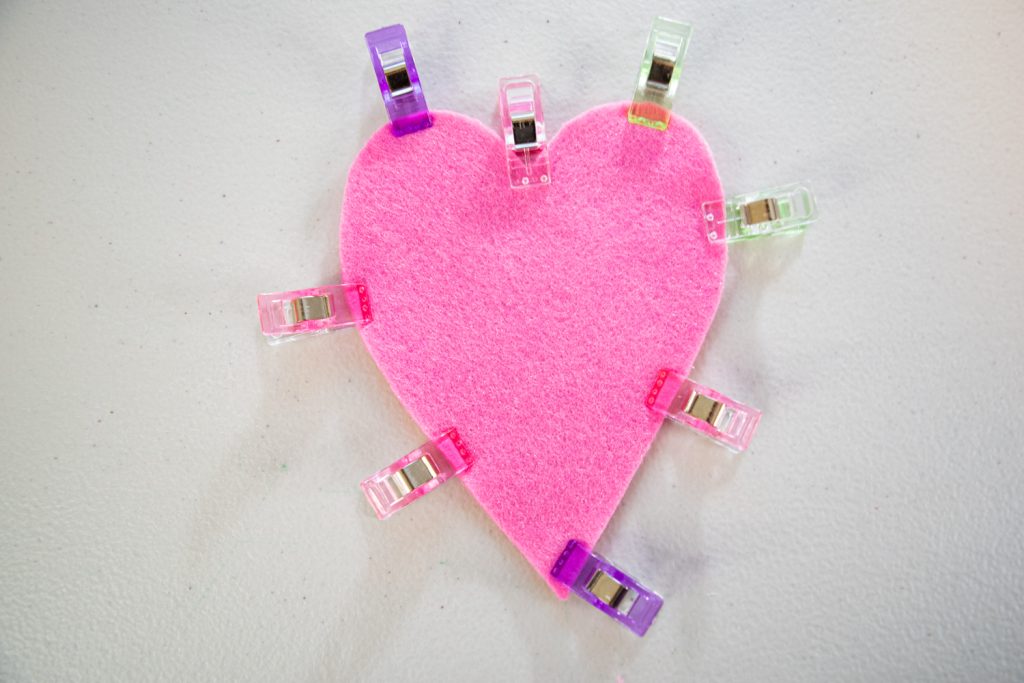
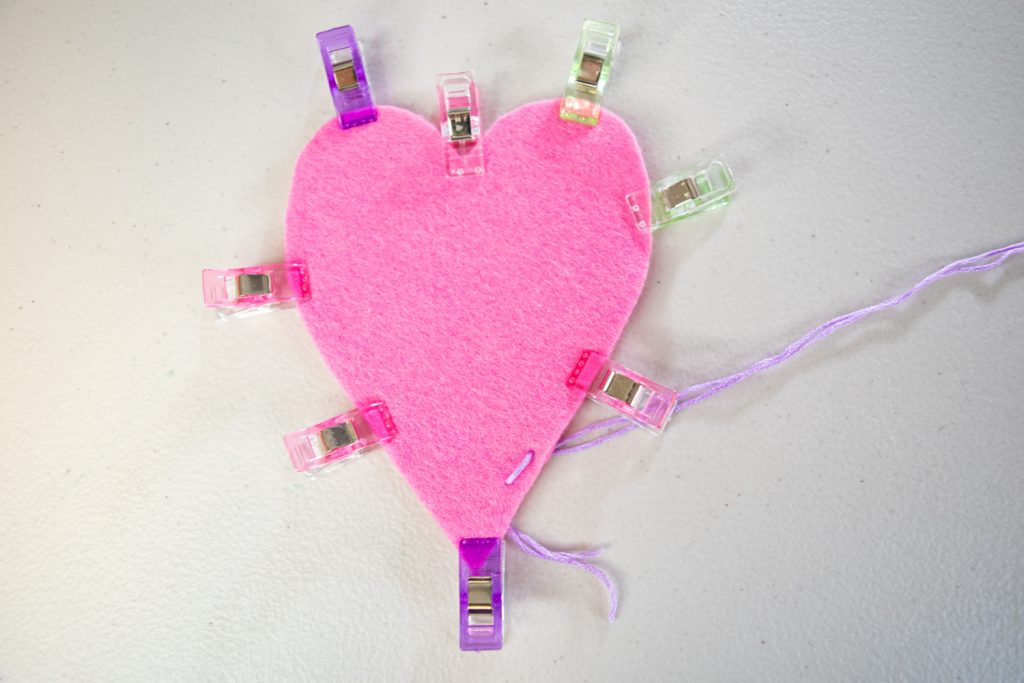
Next, it’s time for the fun part – sewing the pieces together. First, clip the two heart pieces together, lining up all the edges. Clips are great for kids because they won’t get stabbed by pins while focusing on stitching.
Thread a needle with embroidery thread and knot the end. I used a double layer of thread because I wanted thicker stitches that would stand out even more – but a single layer of thread also works.
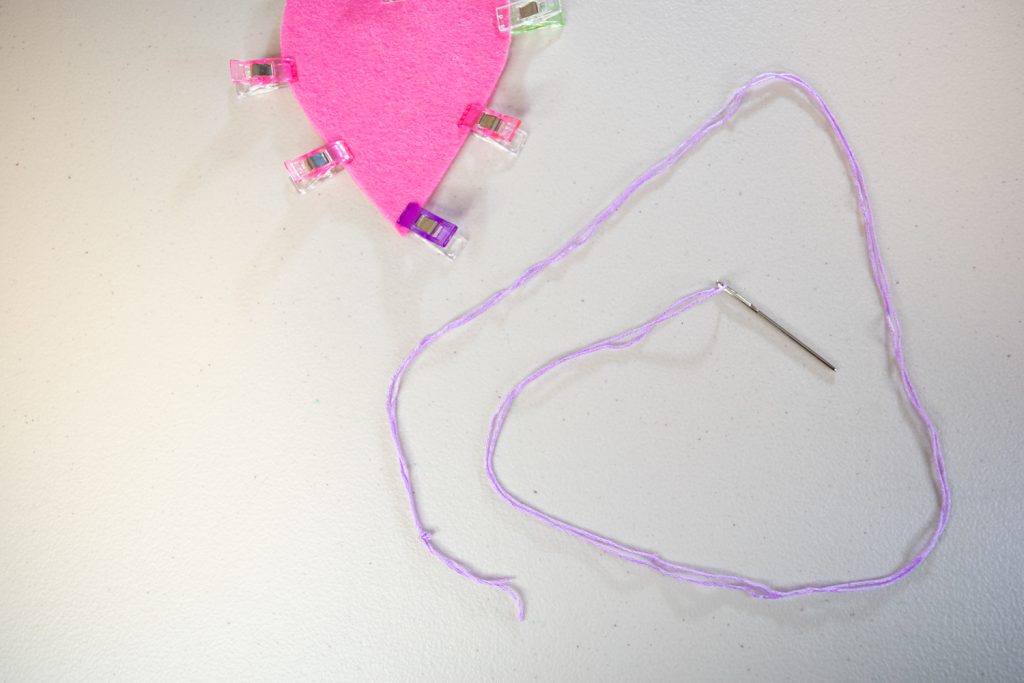
Push the needle through the fabric from back to front somewhere along the edge of the heart, about ¼ inch in from the edge. Pull the thread taut so the knot is flush against the fabric.
Push the needle through the fabric from back to front somewhere along the edge of the heart, about ¼ inch in from the edge. Pull the thread taut so the knot is flush against the fabric.
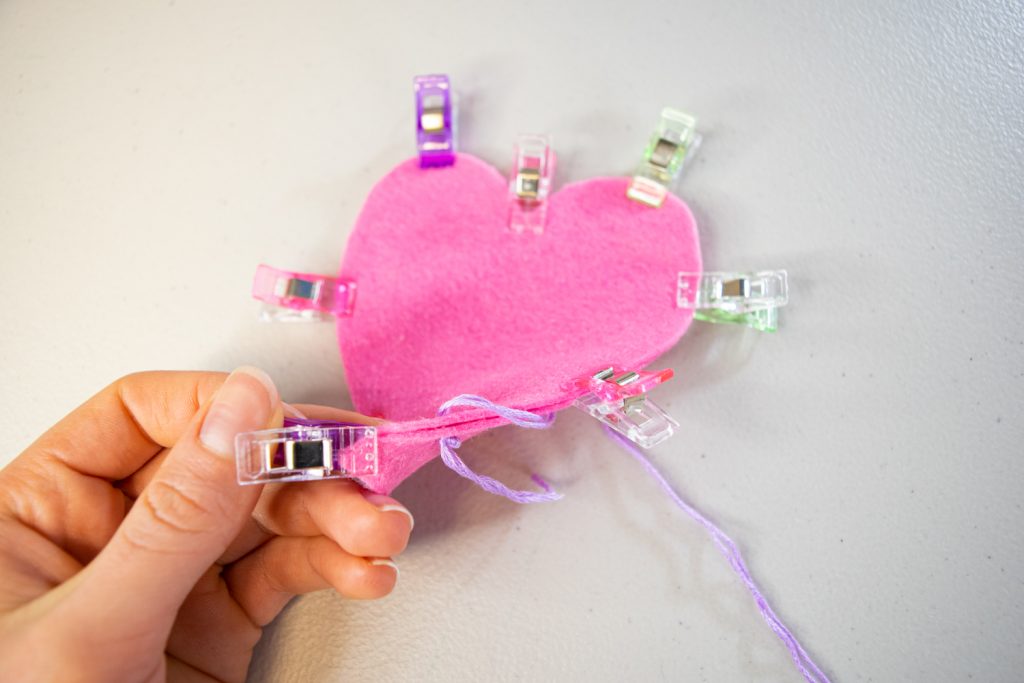
Insert the needle back up through the fabric another ¼ to ½ inch along the edge of the heart and pull the thread taut – but not tight enough that it causes the fabric to bunch up.
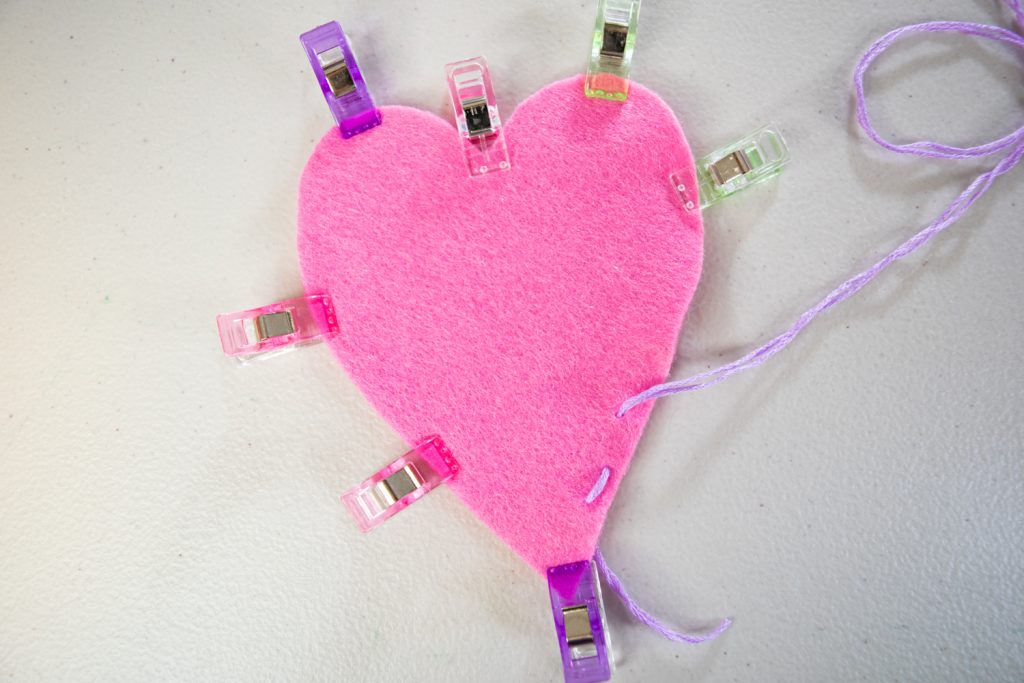
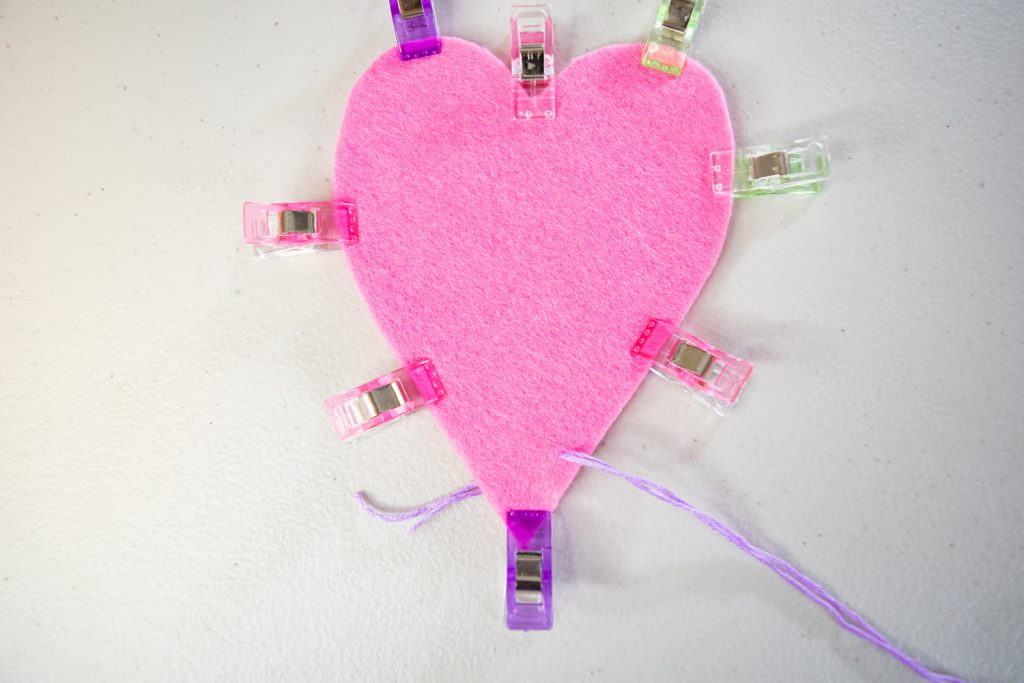
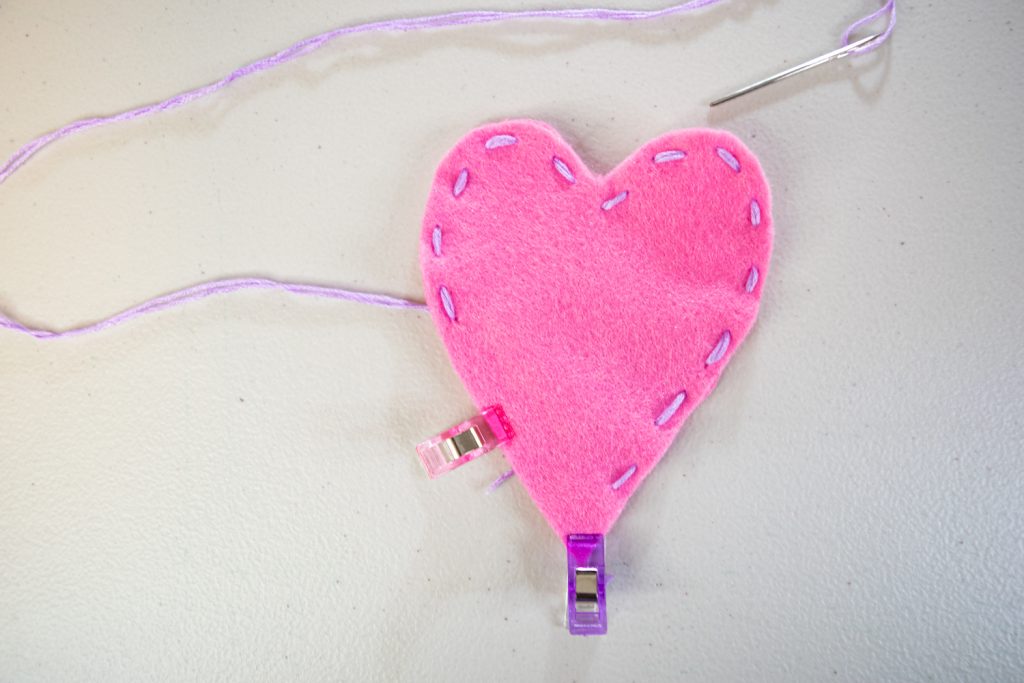
Continue this pattern around the heart shape, focusing on creating stitches that are even and parallel to the edge of the fabric. Stop sewing about 3 inches from the first stitch. Don’t worry about tying off thread tails or anything like that – just set the needle down and pause your stitching.
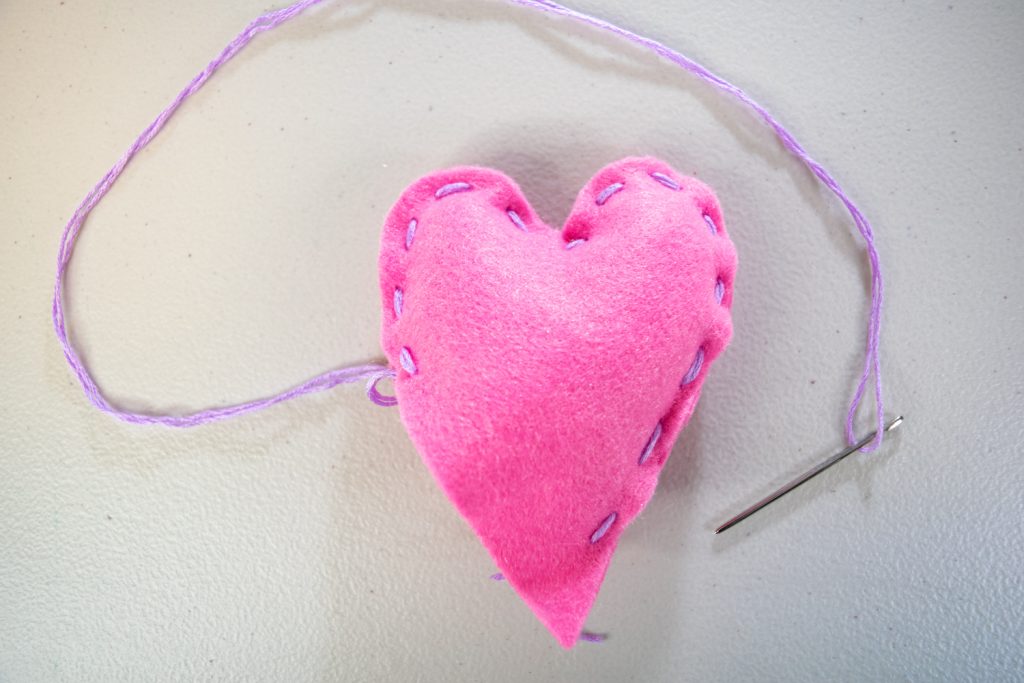
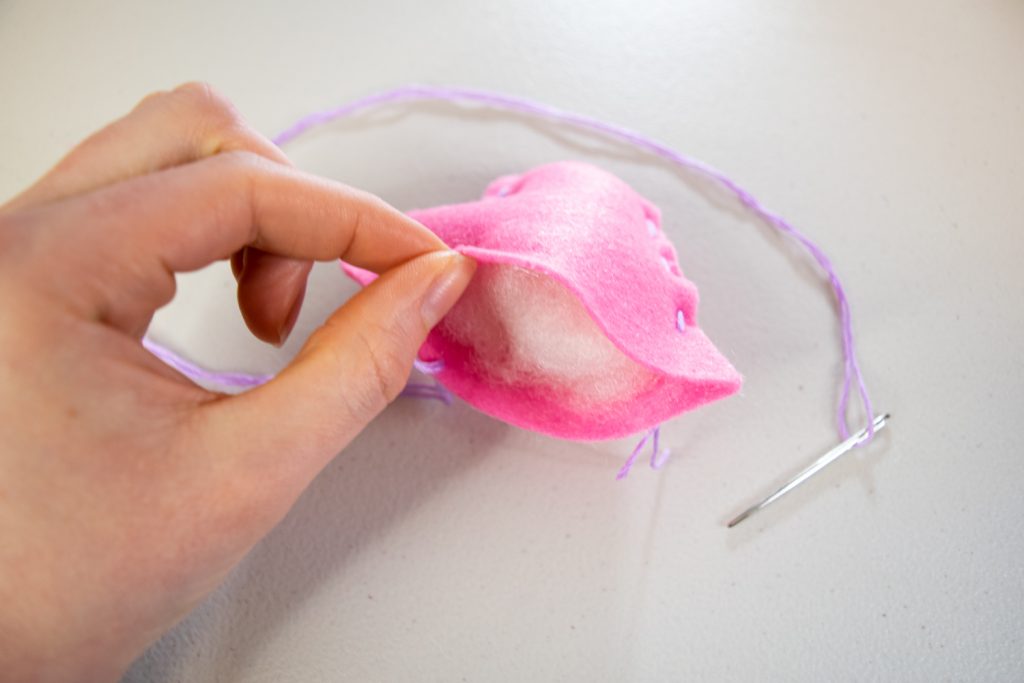
Step Four: stuff the plushie with batting
With the majority of the heart sewn together, it’s time to stuff the plushie. First, remove any clips remaining on the heart to free the opening in the plushie.
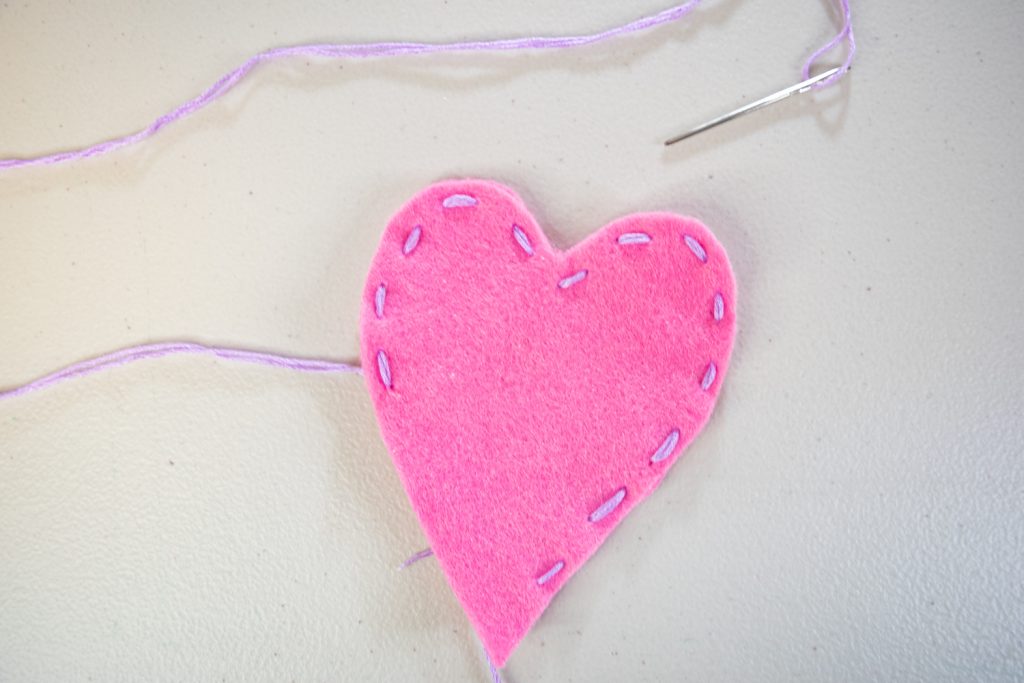
Next, start pushing batting through the opening in the side, filling the portion furthest from the opening first and working your way back towards the opening.
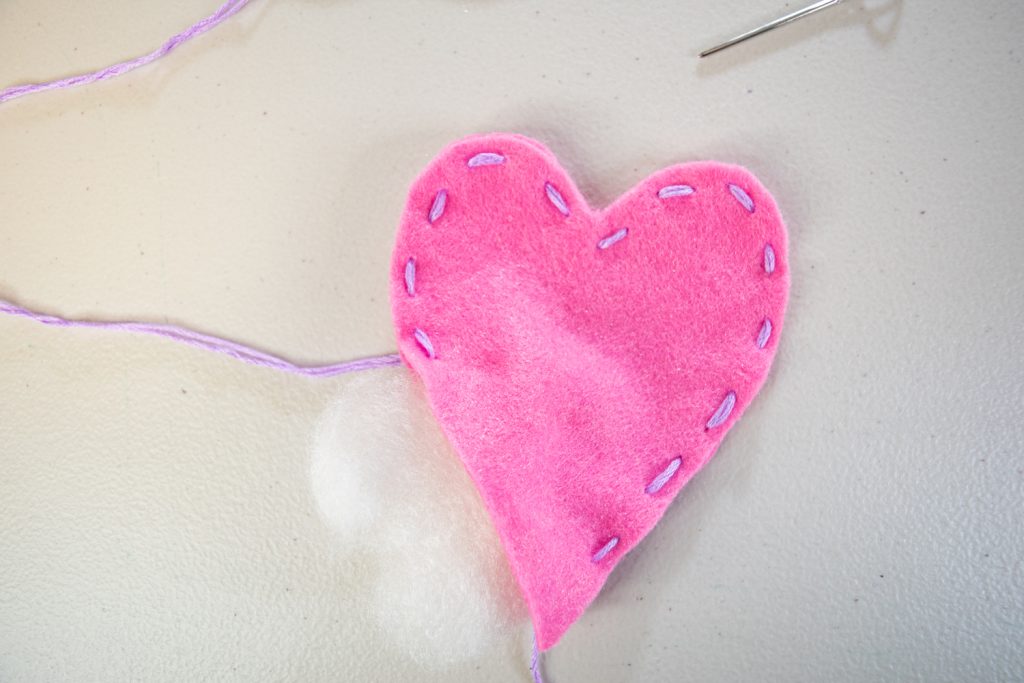
Once you’ve achieved your desired level of stuffing, it will look something like this:
Step Five: finish sewing the pieces together
The last step is to finish sewing the edges of the heart together to fully enclose the batting inside of the plushie. Simply re-clip the open edges of the heart together and continue stitching until you reach your first stitch. Make sure the thread is coming out from the back of the heart.
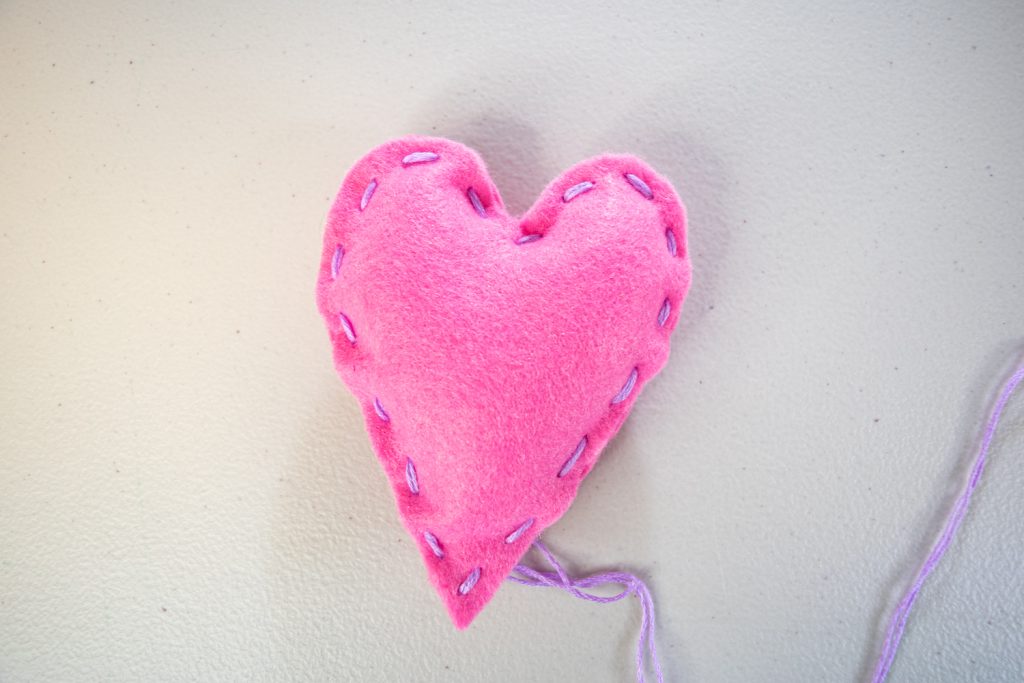
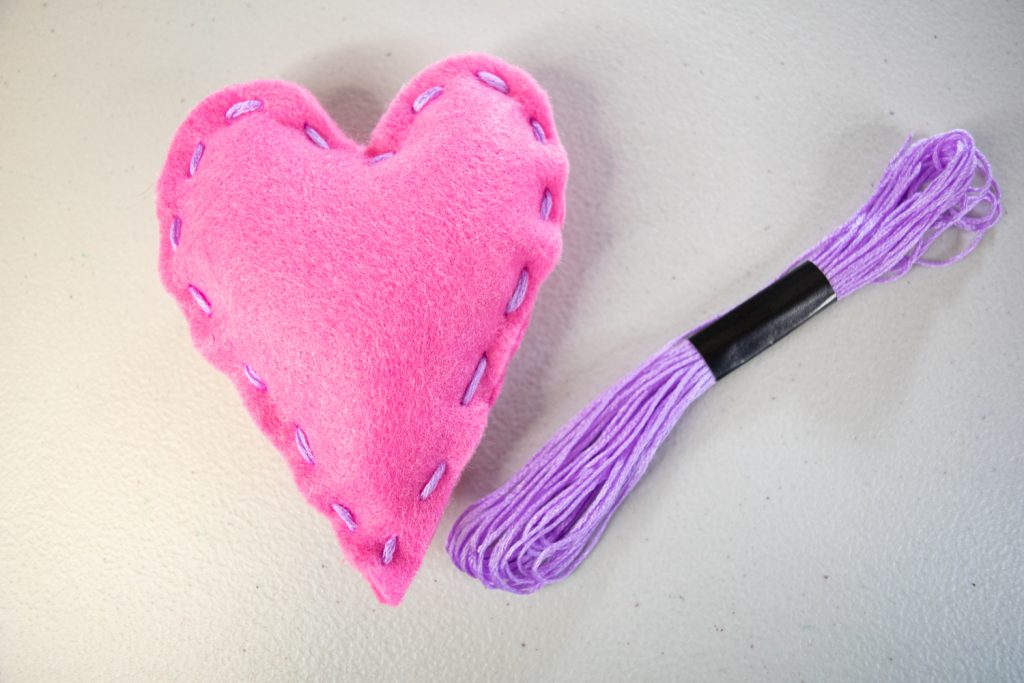
Knot your thread tails together to secure them and trim the excess thread away. You now have a finished heart plushie!

We hope that you and your kids enjoyed this simple, fun sewing project! If you’re looking for more great sewing projects for your creative kids, you might like our sewing kits for kids – keep those kids busy and bond over the crafting table.
